|
|
........ SMOOTH ON ALL SIX |
_______________________________________________________________________________________________
Winter - 2005-2006
The below describe what was done during winter 2005/2006.
It contains the following:
· Sound deadening
· Leakages and repplacements of various seals and gaskets
· Mounting front- and rear seat belts
· Fitting saloon sun-visors on a convertible
· Checking for any rust - thoroughly
· Various bits and pieces, minor issues
Sound deadening
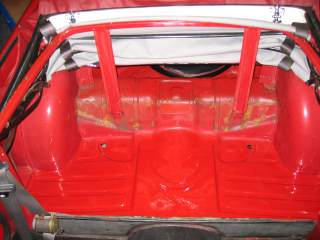
Existing carpets in the boot were removed together with all rear interior, i.e. back seat and Ľ trim. No sound deadening where applied between the coupé and boot – in fact there was an open space to the boot. The noise in the coupé was obviously quite annoying - especially when the hood was erected.
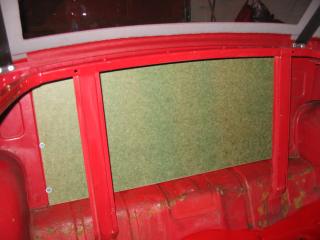
A 5 mm wood-plate was simply placed between the coupé and boot to close the opening. In the rear part of the coupe some asphalt plates where assembled, while water repellent sound deadening material from a boat accessories store where mounted in the boot. The latter was a 2” thick “foam rubber-like” material that does not suck water.
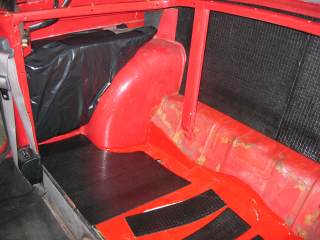
Further I wrapped some standard building insulation material (Glava) into plastic. I used plenty of tape to prevent water entering the insulation material. These where cut to proper shapes to place them behind the Ľ-trim and behind the back seat (and underneath the hood when folded).
Below is some pictures to actually show what has been done. Another picture with some additional text can bee seen here.
I work further with the sound deadening during winter 2007-2008 by adding felt in the coupé and the boot, see here.
|
 Boot before - see opening to the coupé Boot before - see opening to the coupé
|
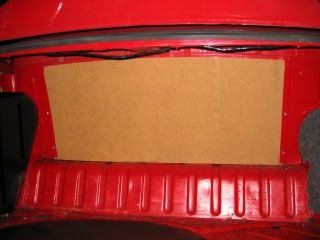 Fitting a 5 mm wood-plate between boot and coupe Fitting a 5 mm wood-plate between boot and coupe
|
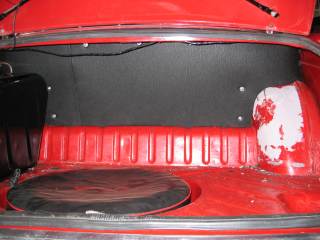 Fitting water repellant foam rubber, 5 cm thick Fitting water repellant foam rubber, 5 cm thick
|
|
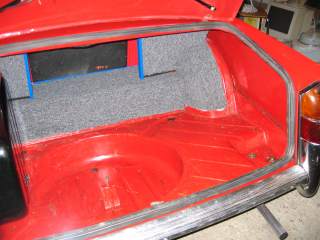
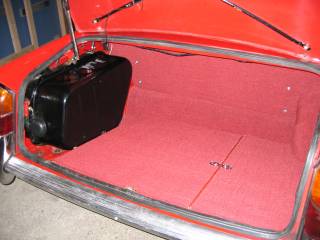
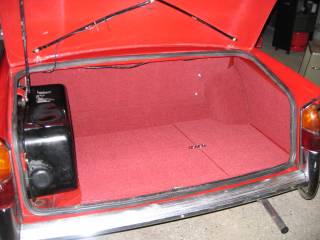 Fitting carpet in the boot ..... Fitting carpet in the boot .....
|
|
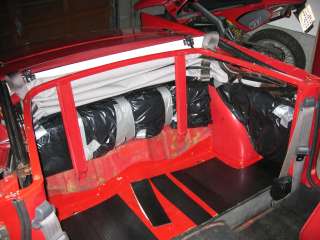
 Rear coupe without any sound deadening material Rear coupe without any sound deadening material
|
|
 Coupe with the 5mm wood-plate Coupe with the 5mm wood-plate
|
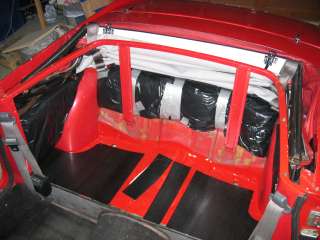
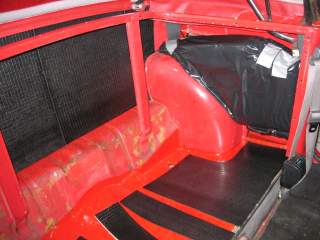 Rear coupe with asphalt plates and the plastic wraps Rear coupe with asphalt plates and the plastic wraps
|
|
All in all - the final solution of sound deadening in my Vitesse:
Leakages and replacement of seals
When I briefly start to use the Vitesse I figured out several leaks at various aprts of the body as well as in the engine. This is pretty much expected for a car that has not been regularly used the latter years, and all this was identified and repaired/changed very early to avoid any problems on longer trips during the summer time.
Seals and gaskets (and parts) that was repaired or changed
Heater valve and seal
The seal was gone as well as the heater valve itself was pretty much worn. Replaced with new one form James Paddock.
Fuel pump
Replaced the seal between fuel pump and engine, and the seal underneath the glass flask on the fuel pump itself.
Seal between screen rail and hood when erected
Mounted some extra rubber seal that sealed it and stick very well to the original seal on the hood
The window screen seal
These where not replaced, but sufficiently sealed by using standardized seal material (for rubber/glass) from any parts and accessories department.
Dropglass- and Ľ light seals.
Where watertight by simple rubber seal and black tape. These seals should preferably be changed some time.
Replaced/missing seals
Valance to wheelarch seal and wheelarch to dash seal. Both these where fitted on both sides. The bulkhead seal was replaced.
Rocker cover gasket
Replaced (not strictly necessary, but just to be sure)
Mounting front- and rear seat belts
Seat belts where fitted for the front seats using already drilled holes. Seat belts from an old Toyota Camry were fitted. The front seat belts needed to be cut, and I used a professional company to fit the lockers properly. The rear belts could be used as they where, however holes needed to be drilled in the rear seat pan – just behind the rear base seat. Bolts and nuts from Securon where used to ensure proper strength. Proper support brackets where manufactured to be placed behind the rear floor pan to bolt the belts properly.
Below are some pictures of these support brackets, as they are and when mounted. A drawing of the support brackets can be found here.
|
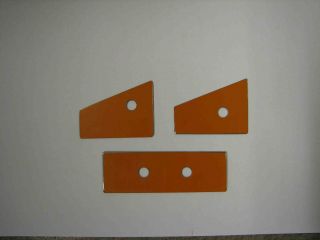 The support brackets The support brackets
|
 A drawing from inside the rear coupé to show the placement of the support brackets A drawing from inside the rear coupé to show the placement of the support brackets
|
|
 One of the support brackets used on the right side One of the support brackets used on the right side
|
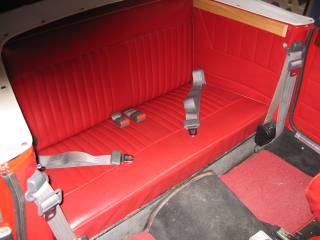 All belts properly fitted All belts properly fitted
|
Fitting saloon sun-visors on a convertible
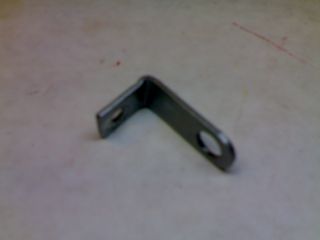
We all know how difficult it is to get hold of a good pair of sun-visors to our convertibles. They are quite rare, and even though some of them show up on ebay they may be quite worn or they suit a saloon – or turn very expensive. It appears that it is only the side fittings that are different for the saloon- and convertibles - otherwise they are similar. I found a good pair for saloon on ebay and won them even though I for sure knew that the side mounting brackets will not fit. All this turned out to be very easy as I just made two brackets from a conventional small angle iron available from all hardware stores. One of the sides of the angle iron was cut, a hole to fit the sun-visor rod where made on the other side and it was bended slightly. I addition one of the holes where closed with filler. I have used this assembly for the entire season an there is no sign of wear and the sun visors are working very well. For me this was a very easy way to get a pair of sun-visors for my convertible – at reasonable price (it seems that the price for the saloon ones is cheaper…..)
|
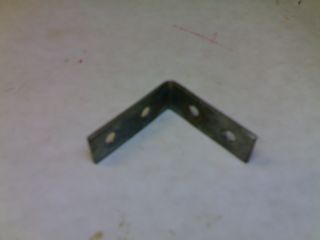 Conventional angle iron available everywhere Conventional angle iron available everywhere
|
 The angle iron transformed to a bracket The angle iron transformed to a bracket
|
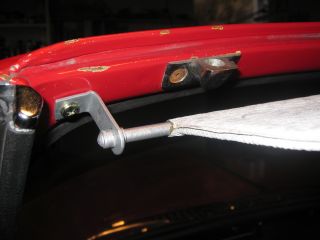 The bracket fitted to the sun visor The bracket fitted to the sun visor |
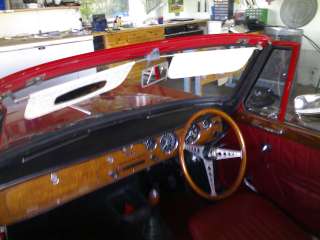 Sun-visors fitted Sun-visors fitted |
|
Checking for any rust
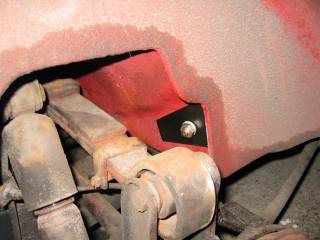
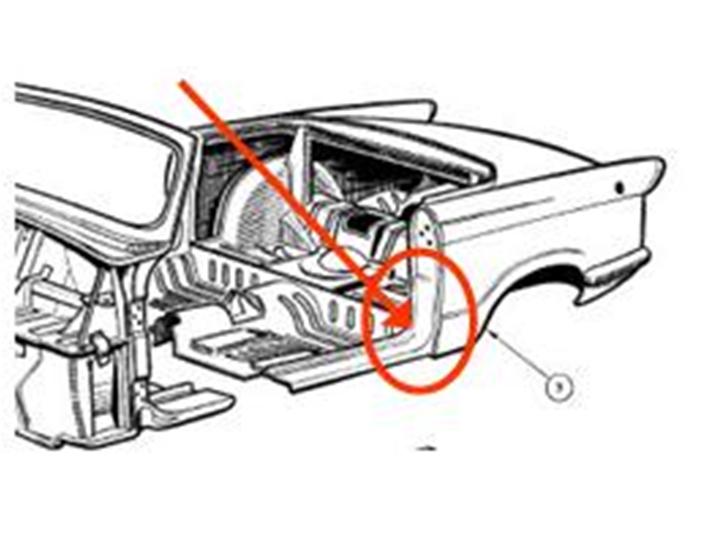
Through the above work I've looked thoroughly for rust at any parts of the interior - underneath the carpet, rear coupé and boot, behind the door trim and rear Ľ-trim. All parts are definitely rust-free and were also covered by wax-oil. Especially the doors where very well protected. The only place I found some sign of surface rust was behind the B-post, see the figure tothe right. This rust is not serious, however it need to be removed and covered. As this part of the car is hardly accessible, I just scratch this quite limited area with a screwdriver and put on some rust converter. This intends to convert any rust into metal through a chemical process. The area was finally covered by white hammerite followed by conventional car paint – also in white. I used white for later easy inspection of this area to detect any rust. After one year the area is still white and shiny. The same is observed in 2008 (February) - white and shiny; no rust :-) |
|
Various bits and pieces, minor issues
I addition to the above a number of small issues have been done:
· Fitting the door mirrors properly
· Cleaning all interior trim and covered it with vinyl cleaner/protector/polish
· Changed the door lock from the right-hand side to the left-hand side. As the Vitesse is an original LHD car it was not possible to lock the left door from the inside. It was expected to be locked from the outside. The right door could be locked from the inside
· The rest position to the windscreen wipers was adjusted, and the rubber was replaced
· Improve the fit of the seat frames and slide bars so the seats are easily adjusted
· Paint the backboard of the rear squab
· Fit aluminium treadplate finishers
· Fit stainless carpet retainers
· Replace front side & flasher lenses
· Make and fit interior wood trim at rear of the coupe (self-made)
· Replace spark plugs (Champion N9YC), air filters, points, condenser, ignition lead, distributor cap, rotor and fan belt
· Replace oil and oil-filter
· Replace the bonnet cone adjusters
· Replaced Voltage stabilizer as the reading of temperature and fuel where not correct
· Replace the coil: The first one was a cheap one that lasted for 6 days (!). The latter was “Bosch – blue coil”. It has earlier been reported that coils may easily be damaged as it is mounted directly on the engine block. This position is rather warm. The coil was now mounted on bolts 14 cm (about 5-6”) from the block. The temperature here is 40 deg C compared to just beside the block where the temp is around 60 deg C.
· Replace oil on gear box and differential (HydroTexaco GL-4, EP-A, 80w-90)
· Identified that the differential was leaking, especially on the left side – seals must be replaced during winter 2006/2007
· Tank sender unit was replaced; NOS from Mick Dolphin
· New battery |